
SOP: Generate a Long Article or Book in CreatorDesk AI
Objective
Use CreatorDesk AI to create a long-form article or book by generating a title, outline, and full content, then editing and exporting the final document in the desired format.
Key Steps
1. Open the Long Articles feature from the dashboard
- Log in to CreatorDesk AI and review the dashboard for usage and previous activity.
- In the left-side menu, click Long Articles to begin a long-form article or book project.
- Confirm you are in the correct workspace before entering topic details.
2. Enter the topic, keywords, and select an AI provider
- Define the article/book topic clearly (example: French Bulldogs).
- Enter relevant keywords to guide the AI, such as:
- French Bulldogs
- home dogs
- pet dogs
- family dogs
- Choose the AI provider you want to use (for example, Claude or Perplexity AI).
- Select the model options available under the chosen provider, if applicable.
3. Generate and choose a title
- Click Generate Titles to create multiple title options.
- Review the generated titles and compare them against your content goal.
- Select the title you want to use.
- If only one title is generated, still select it to continue to the next step.
4. Generate and select an outline
- Click Continue after selecting the title.
- Choose whether to generate one outline or multiple outlines.
- For comparison and flexibility, generate multiple outlines when needed.
- Review each outline from introduction through conclusion.
- Select the outline that best fits your intended structure.
5. Edit the outline before generating the article
- Click Continue after selecting the outline.
- Review each section and edit headings as needed.
- Replace generic labels like “Introduction” or “Conclusion” with more specific subject-based headings.
- Reorder, delete, or add outline sections if needed.
- Finalize the outline before generating the full article.
6. Generate the full article or book content
- Click the option to generate the article.
- Allow the AI to create the full draft based on the title and outline.
- Review the generated content for completeness and structure.
- If the project needs to be longer, add more outlines before generating or continue adding content later.
7. Save and edit the article in the word processor
- Click Save and Edit Article to open the built-in editor.
- Update the title placement and formatting as needed.
- Adjust font, alignment, spacing, and text color to match your preferred style.
- Make any final content or layout changes directly in the editor.
8. Export or copy the finished document
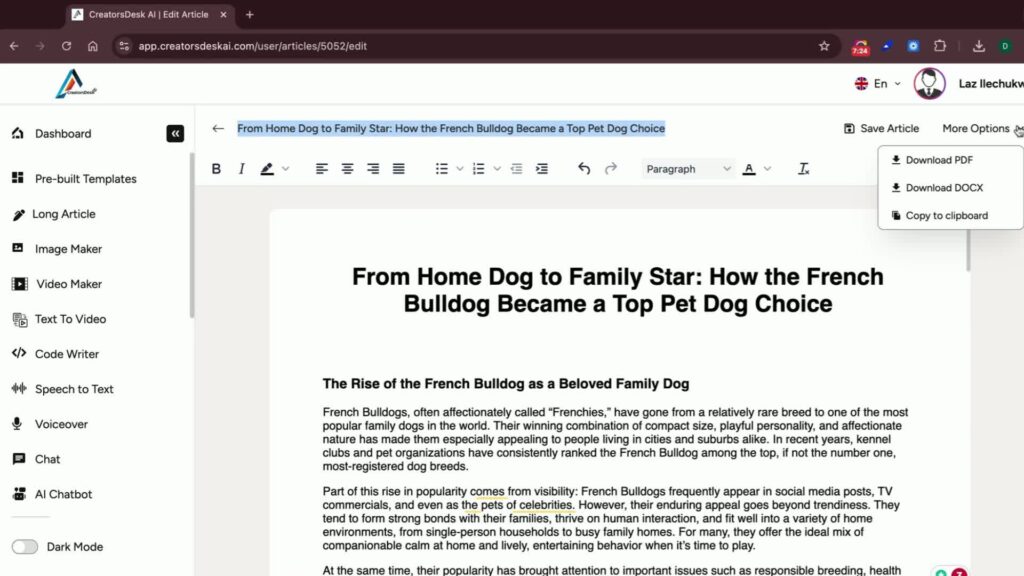
- Save the final version once editing is complete.
- Export the content in the format you need:
- PDF/eBook
- Word document
- Copied text for reuse elsewhere
- If the goal is a longer book or article, repeat the outline/content generation process and combine sections as needed.
Cautionary Notes
- Select a title and outline before continuing; the workflow requires a selection to proceed.
- Review generated outlines carefully to ensure the structure matches your intended topic and audience.
- Do not rely on the first draft without editing; always review formatting, headings, and content accuracy.
- If you want a longer document, add more outlines early rather than trying to expand only at the end.
- Use the correct export format for your final use case (PDF/eBook vs. Word document).
Tips for Efficiency
- Use specific keywords to improve the relevance of generated titles and outlines.
- Generate multiple titles and outlines when you want options to compare.
- Keep the outline concise and organized before generating the full article to reduce editing time.
- Use the editor to make quick formatting changes instead of rewriting content manually.
- For long books, build the content in sections and combine them after export if needed.